Refunds list

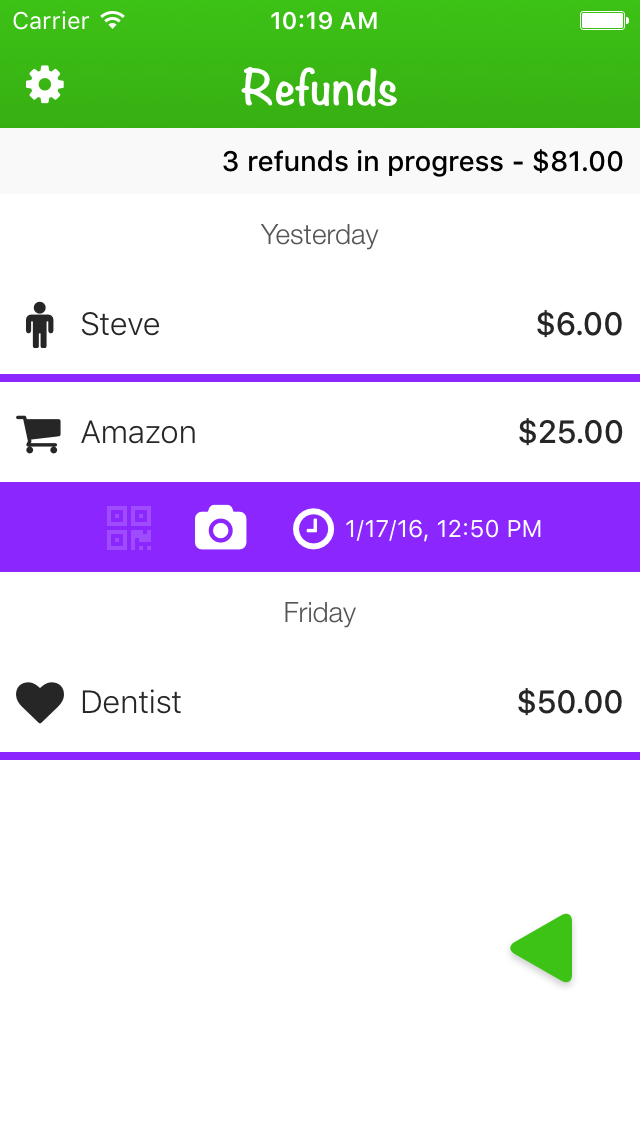
The main screen shows the list of the refunds in progress.
Tracking a new refund
You can track a new refund by touching the ◀︎ button in the bottom right corner and choosing the type of the refund to create. After having touched the ◀︎ button, you can touch it again to cancel and make the types window disappear.
Refund details
You can touch a refund to select it and display its details in the purple bar :
- If you have entered a tracking number you can display it by touching the QR Code icon.
- If you have taken a picture you can display it by touching the camera icon.
- If you have set a reminder, its date will be displayed next to the clock icon.
Clear a refund
You can clear a refund by making a swipe to the right on the row of the refund and touching the ✓ button. You can also clear it directly by keeping your finger down until you reach the right side of the screen.
Delete a refund
You can delete a refund by making a swipe to the left on the row of the refund and touching the trash button. You can also delete it directly by keeping your finger down until you reach the left side of the screen.
Modify a refund
You can modify a refund by making a swipe to the left on the row of the refund and touching the pencil button.
Display cleared refund
If you have cleared refunds, a row at the bottom of the refunds list will let you display them.
Creating a refund

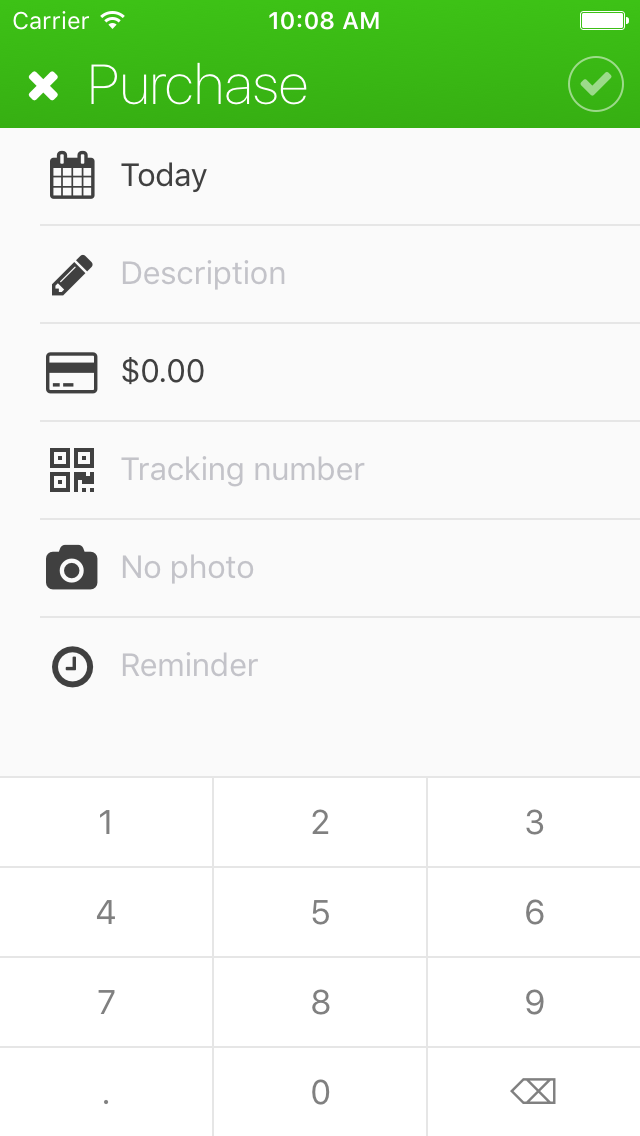
You can enter the following properties in the refund window :
- Type : choose between "Health", "Purchase", "Person" or "Expense report".
- Date : the date of the expense.
- Description : enter a name to know what it's about.
- Montant : the amount of the refund you expect.
- Tracking number : if you made a purchase online and you return the package, you can put its tracking number. You can scan its barcode or QR Code on the return receipt to avoid typing it by touching the QR Code icon on the left of the field.
- Photo : you can take a picture of the invoice, the deposit proof if you return a package, etc.
- Reminder : put a date if you want to create a reminder.
Once you filled the fields you can validate by touching the button in the top right corner.
Settings

To show the settings, touch the button in the top left corner of the refunds list.
There you can activate iCloud synchronization and automatic deletion of cleared refunds.